// News item
What Is a Cable Tester Good For? Guide to Testing XLR, Jack & DMX Cables
In the events industry, reliable cabling is essential—a bad contact or short circuit can halt an entire show in seconds. A cable tester provides quick answers: which wire is broken, where the short is, and whether the cable works at all. Though often undervalued, a good tester can save hours of troubleshooting and unnecessary replacements.
In this guide, we’ll walk you through what a cable tester is used for, what types of faults it can detect, and how to set up measurements for different cable standards.
What Is a Cable Tester and How Does It Work?
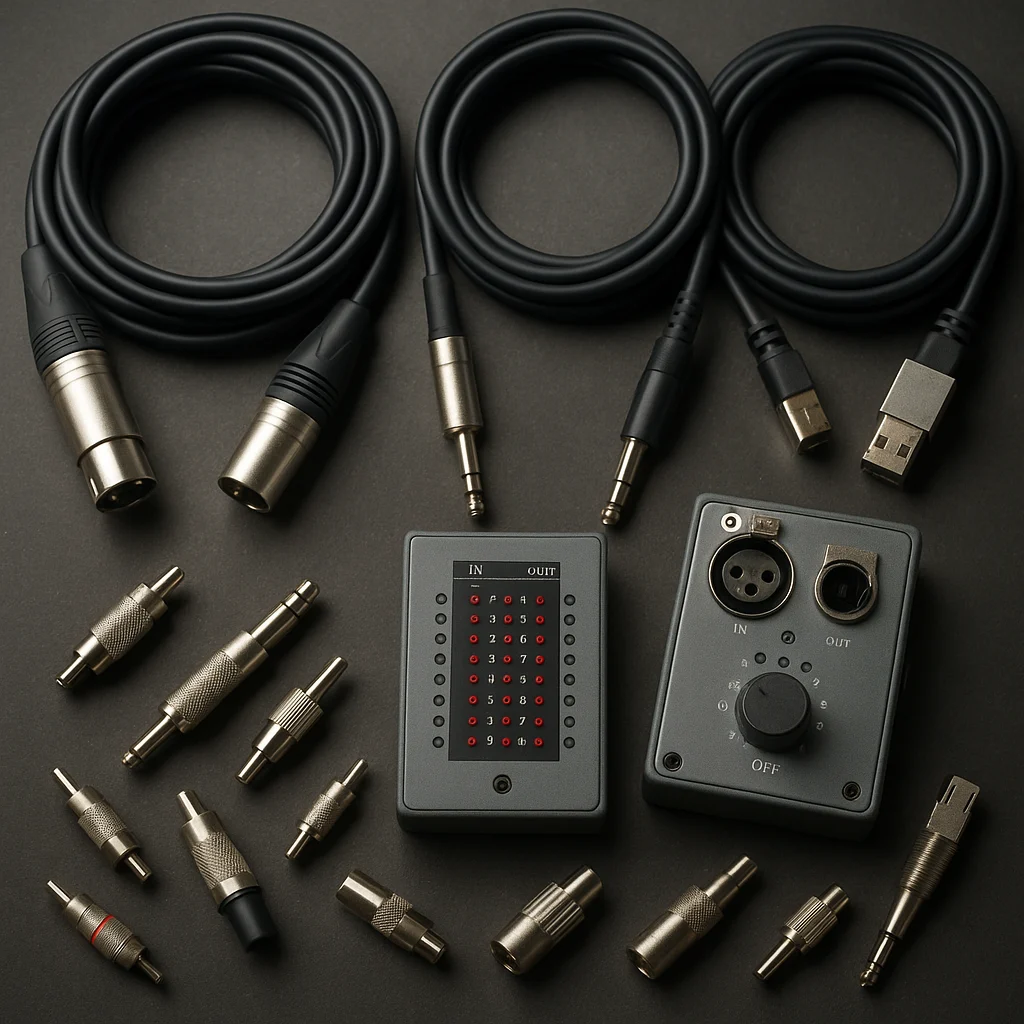
A cable tester is a diagnostic tool that performs continuity tests on cable conductors. The simplest models use LEDs to indicate whether individual contacts conduct, while more professional versions—such as the Behringer Cable Tester CT100 or the DAP Audio XLR Cable Tester—can detect shorts, ground faults, and phantom power issues as well.
The basic principle is simple: you plug one end of the tester into one connector of the cable, the other end into the opposite side, and the device checks each conductor individually. If everything is fine, the LED sequence runs through according to the correct pin assignment. If a conductor doesn’t conduct or there’s a short circuit, it indicates this immediately.
What Faults Does a Cable Tester Detect?
The most common faults a cable tester identifies instantly:
- Wire break: One or more conductors are broken, with no continuity. Often caused by mechanical stress or poor soldering.
- Short circuit: Two conductors are touching each other, usually due to damaged internal insulation or poor soldering.
- Ground fault: A conductor touches the cable shielding or housing—particularly dangerous in XLR and DMX cables.
- Miswiring: Pin assignments were swapped during soldering, for example pins 2 and 3.
- Phantom power fault: More sophisticated testers check whether 48V phantom power reaches the microphone properly.
Step by Step: Testing Cables
1. Prepare the tester: Turn on the device and select the appropriate mode (XLR, jack, speakON, DMX, etc.). Most testers automatically recognize the connector type.
2. Connect the cable: Plug both ends of the cable into the appropriate ports on the tester. For XLR, pay attention to male/female compatibility.
3. Evaluate the LED indication: Normally, the LED sequence lights up in 1-2-3 order. If one is missing, it indicates a wire break. If multiple LEDs light simultaneously, it suggests a short circuit.
4. Document the result: Mark faulty cables with colored tape or cable labels, and separate pieces that need repair.
Special Cases: DMX, speakON and Multicore
DMX512 cables are tested the same way as XLR audio cables, but here proper impedance and shielding are critical—only more advanced testers (e.g., Neutrik NTE1) measure these.
SpeakON connectors require special adapters for testing. Check the +1/–1 and +2/–2 assignments separately.
Multicore (stage box) cables require time-consuming testing: every channel must be checked individually, so it’s worth creating a chart to record any faults.
Final Tips and Maintenance
Regular cable testing not only filters out faults but also prevents unexpected failures. It’s recommended to check all cables before live production, especially rental inventory.
To maintain tester accuracy, keep the contacts clean and avoid direct exposure to dust and moisture. If you use a mobile version, a protective case can extend its lifespan.
A cable tester isn’t a luxury, it’s an investment—it saves not just time, but nerves and money in the long run.